Welcome. In this video we are going to see how to install Oracle WebCenter Sites 12c.
Before starting let’s check the prerequisites for operating system, database and java runtime. We need a supported operating system, and we will use Oracle Linux version 7. We need a supported database, and we choose, with no surprise, Oracle. Finally. we need a Java Development Kit, and we are going to use the latest available when I writing this.
This procedure can be executed in a physical server but for the purpose of this video, I am using a Virtual Machine, and I used VirtualBox. So I went on the Oracle website, and downloaded VirtualBox. I used VirtualBox for Windows, but there are versions available for Linux and Mac too, and they work in the same way.
A virtual machine alone, however, is an empty box. You can install everything from scratch, but it a time consuming task. Luckily, you can download an image, which already included operating system, and database. In the Oracle website is available an image, which fits our purposes for installation Sites: it is the Oracle Developer VM. I am not showing here how to download and install VirtualBox and the Image. However it is pretty simple and obvious process.
The only problem has this image, is the outdated JDK. It does not fit the requirement of a supported Java Development Kit. So the first step is downloading and installing the latest JDK available for Linux. You can directly download and install it from the browser. The system will ask you for the root password, in order to perform the installation.
Now we can proceed installing Sites. We go to the Sites download page, accept the agreement and we download it. See the video for the location. You need to authenticate to be able to download.
After Sites, we need to download the Weblogic application server. Note the location in the video. For Sites, the enterprise manager is a required component. The recommended download is the fusion middleware infrastructure.
Last but not least, in order to install the analytics features we download also Endeca server. We will not show Endeca installation in this video, however.
Let’s wait for the download. All the files are distributed in zip format, so we have to extract all of them. For simplicity we unpack everything on the desktop.
Now we can start installing. First step is to install the middleware infrastructure. We install from the command line. We first check we have java in the path and the version is correct. Then we launch the executable jar with the command in the video. The installer unpacks itself, then finally shows its user interface.
Steps to perform are simple: skip the patch install because we do not have any patch.
Then select the installation folder. We are going to use a Middleware folder in the home directory.
Finally select the first option, since we do not want the examples of the infrastructure.
The installer will ask for your email address then it will complete the installation with no intervention.
Installing Sites is similar. We go in the installation folder, and we execute the executable jar containing webcenter sites, as you can see in the video.
After the installer extract and launch itself, you are asked again for patches. You can skip this again.
Then it asks for the folder, where you just installed the Middleware.
Finally, there is an option asking what you want to install. We will install Sites with examples. Now, just watch the installer to complete the installation.
Once the software is installed, we need to create some schemas in the database. We will use the Oracle Repository Creation Utility for the task.
Open the terminal and change to your main installation directory. The R C U is located under oracle_common/bin
You need to start R C U, then communicate where is the database server we want to use.
Now, let’s select we want to create a repository.
You have a form where you have to provide the details of the database server. In the virtual machine it is located in the same host. So we give localhost, with the usual port 1521 and the service name O R C L.
The virtual machine we recommended has a default user sys with password oracle. The R C U connects to the database,
Once connected it offers a selection of the schemas we want to create. Of course we select the webcenter sites schemas.
Next step is to provide a password for the schemas. This password will have to be provided in the next step for connecting Sites to the created databases.
Now just sit down and watch the system to create our schemas.
To install Sites you actually need to create a weblogic domain, using a template provided with the installer. We will use the configuration tool for weblogic for this task.
Open the terminal and change to your main installation directory. The configurator is located under oracle_common/common/bin. Note this is a different directory than the R C U utility.
Start the domain configurator, then select you want to to create a new domain.
I am giving sites as the name of the installation directory.
I am going to select as an option the WebCenter Sites template with examples, then as components Visitor Services and Insights. Note in this video we only show how to install Sites.
I am giving a password for the weblogic enterprise manager. Note this password must be used to start the services.
Now we have to configure the database to use. Here the system will retrieve the schemas we just created in the preceding step. We need to provide a password, the password we used when creating the schemas.
We are offered to use the schemas we created with R C U . We just need to accept them.
Now the system will verify the connection to the database. This step is very important.
We can now configure the machines and assign them to servers. Without assigning machines we will be unable to start the services for completing installation. So we choose here to assign all the services the local machine. You may do differently if you have more machines.
That is all for the domain creation.
We are ready now to start servers. We have actually to start 2 services: the node manager and the administrative server. Those 2 are required to actually start and configure sites.
To start services, go in the bin folder of your domain directory. Now, first start the node manager as a backgroud process. Afterwards, in the same directory launch the administrative server.
Now an important step: you need to give to sites a special authorization. To do so, first change to the folder W C sites/bin under the domain folder. Then execute the script grant O P S S permission.
You need to provide the weblogic credentials you set when you created the domain.
I also create a shared folder. Note that in production systems a shared folder may be placed in a N F S.
Now, access to the enterprise manager, using the URL shown in the video, then start Sites.
Check now that Sites is up and running, invoking the Hello C S path.
We are finally to the sites configuration, the last step. Access to the sites-config-setup path.
Click on Begin and select the shared folder you just created.
You can use the default for the J N D I name.
Now specify the I P and the port of the main entry point of WebCenter Sites. Since we are using a virtual machine we use its I P.
Here we specify the entry point of the C A S, and we will use the same I P as before.
For a development environment we can leave the default passwords. Of course they must be changed for a production installation.
We have almost finished. Click on start to configure.
You can just watch the configuration to complete. Sites will be ready after this step is finished.
Let’s verify if we can login in Sites to check if everything is installed.
WebCenter Sites 12c has been just released and introduced a lot of new features. The most important, and longly awaited feature is a Model View Controller architecture for developing websites. It includes also full support for groovy scripts to implement controllers.
In this post I am going to show how to use MVC for creating a very simple website. Of course, I assume here you already downloaded and installed WebCenter Sites in your environment. I recommend you download and install WebCenter Sites following the excellent tutorial here.
Configure a site in Sites
First step is configure a new site in Sites. Once you installed Sites, we can log in to create a new site.
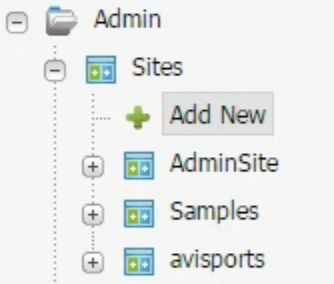
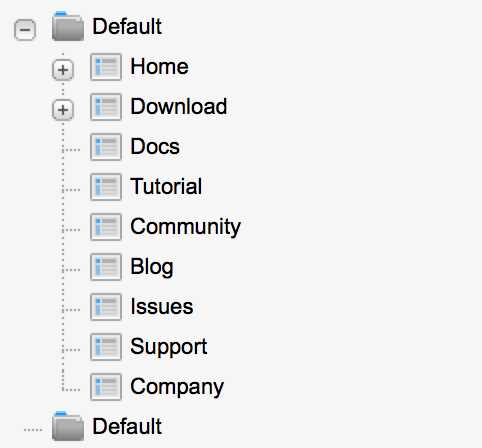
You need to access the admin, select the Sites node and then click on “Add New”. Specify then the name you prefer.
We need now to enable some assets to work with. For defining the content model, we need to enable Pages, with PageAttributes and PageDefinitions. For code we need to enable Templates, CSElements and SiteEntries. But the most important for our goals is the new asset type WCS_Controller.
Don’t forget to enable start menus for all those assets, since without them we will unable to create our assets.
Another important step in site creation is enabling appropriate roles for an existing user, in order to be able to access the newly created site.
The role AdvancedUser allows to access the advanced interface, where we can create our content model.
The role GeneralAdmin allows to access to the Administration node from the new site. It is not necessary but usually useful.
Last but not least, the role SitesUser allow to access the contributor interface, where the content editors can create content.
Create the content model
Now, we need to define the content model. In particular we create subtypes for existing types. In this example we will see how to create subtypes for pages only.
We need first to decide which attributes we want to use for each subtype we are going to create . In this example we will only create a home page with a title and a body.
To begin with, we need then to create some PageAttributes. The first attribute is Title.
Creating a Title attribute is a matter only of creating an asset of type PageAttribute and declare is type to be a string.
Slightly more complicated is the creation of the attribute for the body.
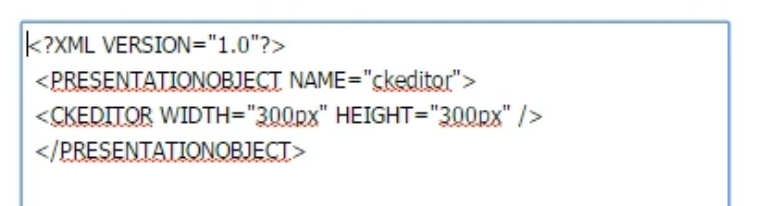
Since we will want to use a fully featured WYSIWYG , we need first to create an attibute editor. It will enable to use the rich text editor distributed with Sites.
An attribute editor is defined by an XML file described in documentation like this.
Once the attribute editor is created we can create a PageAttribute of type text and select the attribute editor.
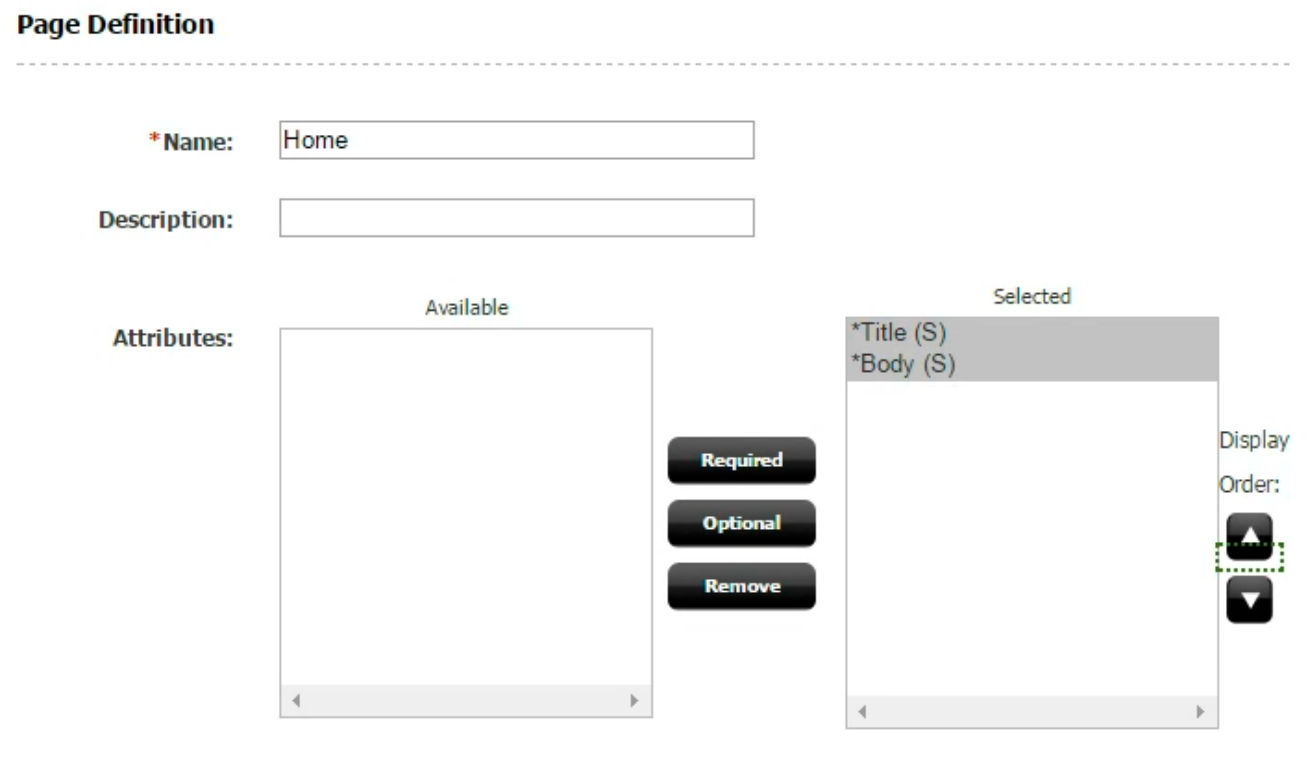
Finally, we need to put the attributes together, creating a PageDefinition for pages.
Create then a new asset of type PageDefinition, and select which attributes it uses. In our case, the asset form will show our attributes.
Let’s select both as required attributes.
Rendering the Content Model
Now, we have the content model, but we need to say how we want to transform the content in actual html pages, or “render” the content.
WebCenter Sites used to follow a view-model only, but finally with the current release, rendering is implemented with a model-view-controller pattern. This means the rendering is a 2 step process.
The first step is performed by the controller, which extracts the content and pass it to the view.
The second step is performed by the view, which actually displays the content.
Writing the Controller
Let’s see now how to write the controller. We need to create an asset of type controller. So let’s click on “New Controller” and give it a name of “HomeController”.
In the form Sites displays a skeleton of code. We can leave the skeleton as is, adding our code where there is a placeholder.
Let’s discuss now how to write the controller code.
The controller main purpose is extracting the content from the database and storing is a form easy to be rendered. In our case it is a Map. So everything starts putting objects in the models map provided.
The content is extracted from the database using an asset reader. Controllers provide the method to create them, so we start invoking newAssetReader().
The asset reader must read a single asset, and the id of the asset we are rendering is available with the getAssetId() method, so we can tell to the asset reader which asset we want it reads with the forAsset() method.
Finally, we state we want to selectAll() the attributes of the asset, then read() them. The result is a object we can place in the map to be passed to the view.
Writing the view
Now let’s examine how the view code is written. It leverages JSP, using embedded expressions, making easy to display the content. As a result the code extraction is extremely simple.
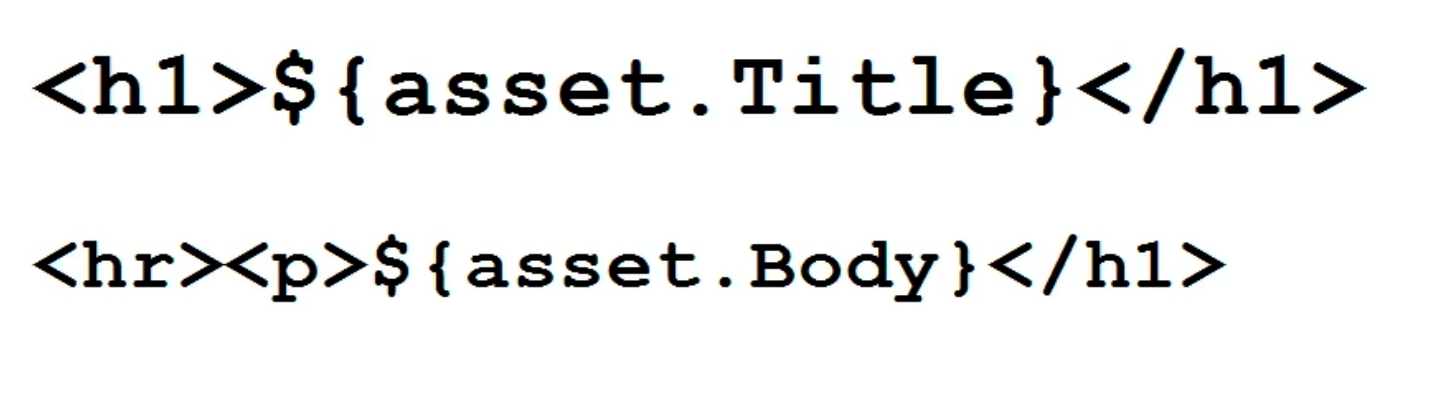
We show then a very simple example, omitting all the styling and focusing only on the HTML.
First we will write the title as an h1 heading and we extract the Title attribute.
Second, we do the same but placing the body in a p tag, separated by an “hr”. And that is all.
Now we can create a template. There are a few things to note.
We give name HomeView, following an obvious convention.
We need to choose the associated controller, the one we already created (HomeController).
The controller must be used only for assets of type Page.
We will use declare the template should be used as a Layout for rendering pages.
We generate a JSP for the template code.
Finally we put the code we already discusses in the body of the JSP
Getting the final result
We are now ready to see the final results. We can now create a new web page, provide the content and get it rendered.
First we need to switch to the contributor interface, the only interface usually seen by the content editors. The interface for creating content model is made accessible only to developers.
We have now a New Page menu item, allowing to create pages. When we create a new Page, Sites will assign the page definition we created, since it is the only one available.
As a result, the system will ask for the two attributes: Title and Body.
We give HomePage as a name for the new page , and we select the template we defined as its layout.
We fill the two fields Title and Body we created. Note the Body has a WYSIWYG editor enabled.
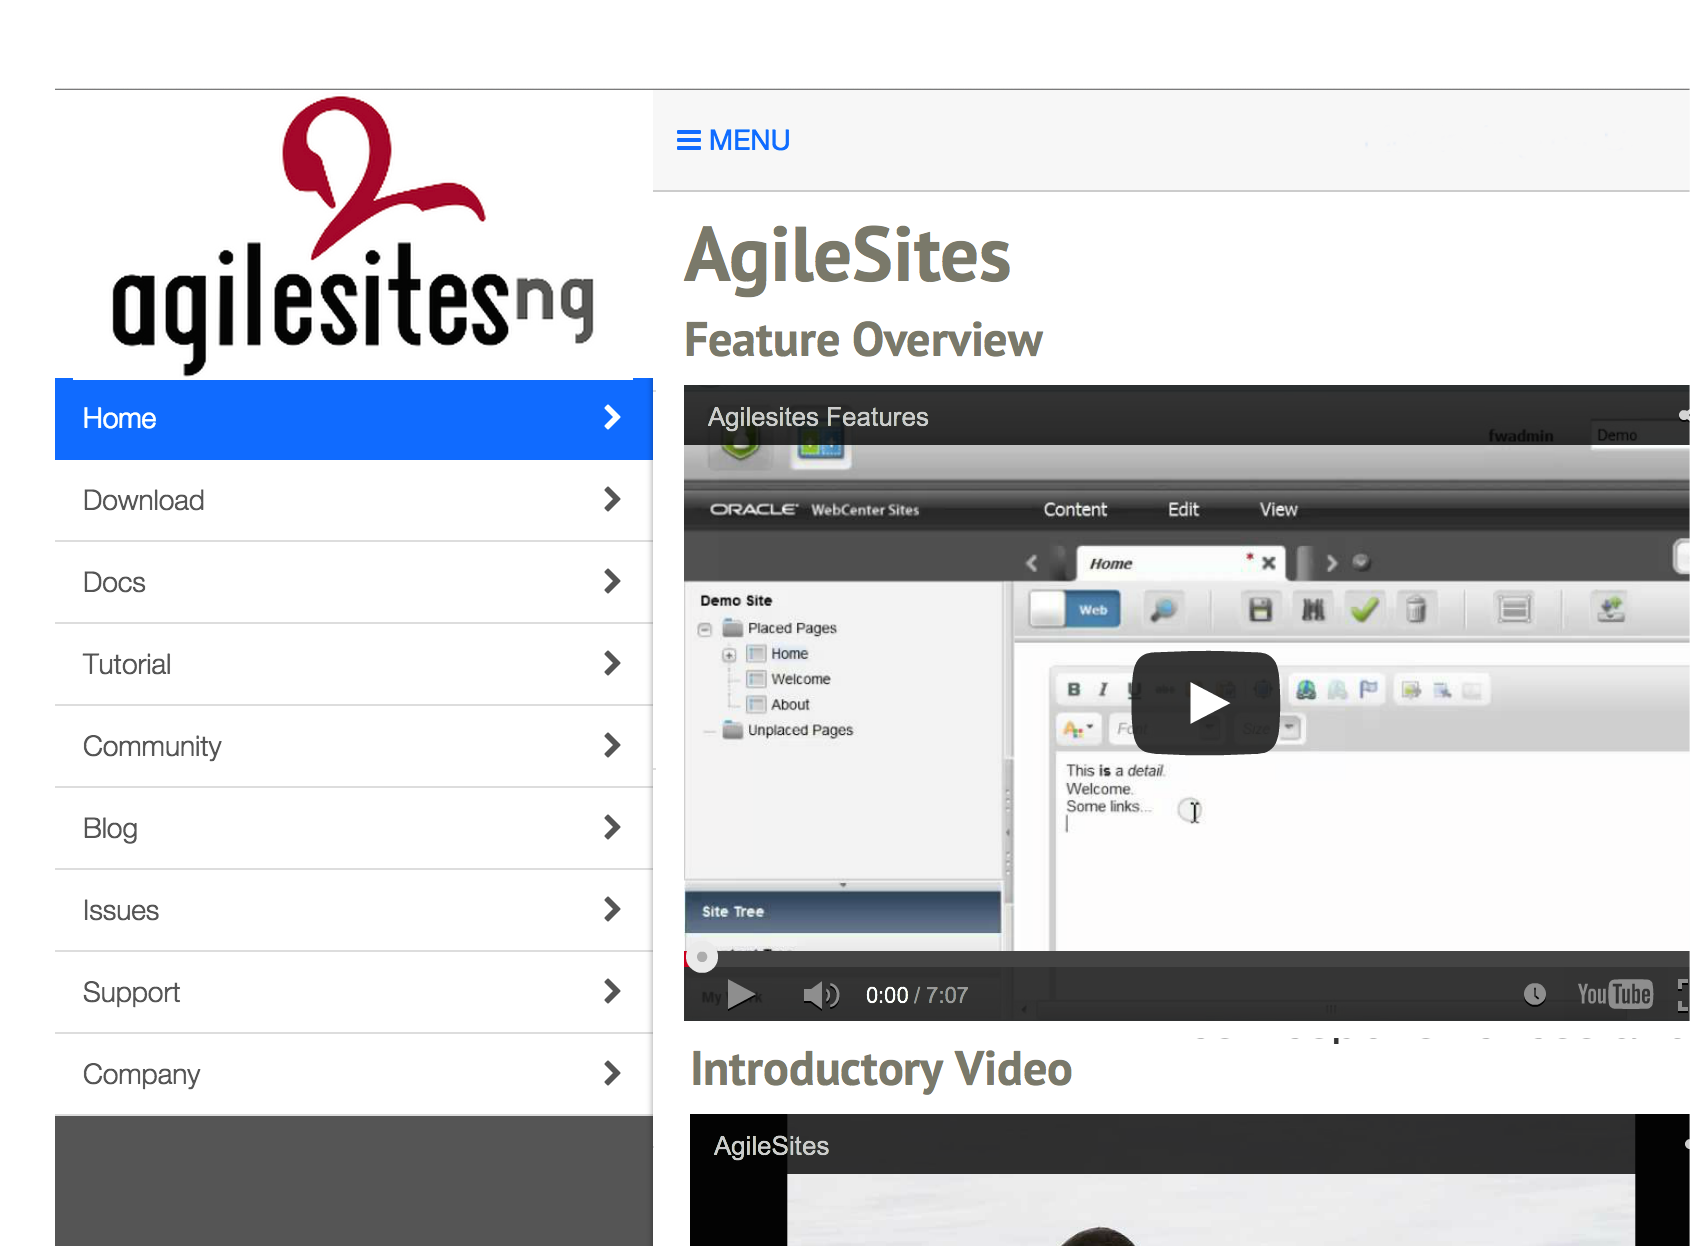
Once the page is saved, just switch to the web view to see the results of all our efforts. The page is rendered, invoking the view which in turn invokes the controller for retrieving the content.
A frequent question people ask on AgileSites is: why you did it?
Well, it was not really a matter of choice. It was a matter of necessity. If you want to know, I will tell the story.
The tale of a Fatwire project
Once upon a time, it was something between 2007 and 2009, we were contracted to implement a web site using Fatwire (the precursor of WebCenter Sites), then hand it over to the customer for maintenance. The customer provided the HTML mockup,we had just to code the jsp based on that mockup.
So we did our work, using just plain JSP as it was the standard at the time, and we built the content model, mostly working in a JSK that then we published in customer Development server.
Once finished, it was supposed to be all.
I was wrong. After the delivery to the customer, they first started to change the code, then they kept calling us back for a long list of different tasks to help them to add a lot of other features they decided to implement.
The problem is that our suppor work doing those changes became an unbelievable pain because of the limitations of the enviroment.
The nightmare of updating the html
The first annoynace came from the HTML. The original mockup was changed. Actually the customer changed the mockup multiple times then he gave it back to us for implementing it back in the JSP.
So the first problem was: were the change happened? Once you have implemented the JSP, the mockup has been split in many difference pieces and lot of code has been added.
So we had to use a version control system, diffing the html, the patiently trying to locate the JSP where the change happened. Very often the html was changed structurally so the changes were spread in many different templates and we ended up, multiple times to have to rewrite many templates. The logic and the html were mixed up and that is totally wrong.
After this experience I understood that HTML must stay HTML in the original form, and Java must stay Java with no markup. Mixing html and code is the biggest mistake in the history of internet development and it is acceptable only in those rare cases (today almost disappeared) when the HTML and the Java coders are the same person.
People don’t read manuals
Part of the work was to support the development done by other people. I cannot believe to what I saw. Even if our code was done properly, with all the correct tags used according best practices, maintainer did not even care to understand.
They did a quick look to the tags, and they found one tag they undesrtood: ics:sql. After this, all they did it to throw SQL queries everywhere, using then a lot of embeded java code to render queries.
When I asked why they did it, they simply said they did not understand the complicated API so they had no choice. Actually I have to admit that ics:setasset or assetset:getaatributevalues are definitely complex, but I never realized they are a real stopper for some people.
There are people simply they cannot use a system where there are many conventions and calls with multiple parameters. So I realized what they really needed an api very simple and immediate.
Something like:
Asset a = e.getAsset(); a.getString(“Title”)
So I started to wonder how to make a library simple as this.
Java java java everywhere
JSP are supposed to be a sort of “extended html”, and you are supposed to perform your tasks using mostly only the tags. In practice, you always need to write complicated logic, and using tags for this is simply not an option. So you end up opening a scriptlet… and your entire JSP became a large snippet of embedded Java code.
Except, you soon realize that the embedded Java within a JSP is NOT full Java. You cannot create a class and share it. So you cannot even have a method used in 2 different templates, you need to duplicate the code. The biggest advantage of Java (code reuse) is simply not available.
Indeed this is what many Sites implementations are: a giant copy and paste of the same code repeated with modifications spread everywhere. A real maintenance nightmare.
The site kept breaking
Take a team of untrained developers, working without a good knowledge of the system, using a shared enviroment, working with copy and paste programming, and having to apply a mockup that is changing all the time. What you get? Answer: a giant number of issues. What is worse at every change you can break something so you may end up having to retest the entire site.
The customer kept asking me again and again: is it possible to automate tests? I wished all the time I could have answered something better than “yeah, you can use selenium”….
Moving back and forward the content model: oh my
The customer kept changing the content model. Basically with no planning: every time they needed someting they added an attribute somewhere, with a lot of duplication of content too. Then they hacked the code to use it.
Since we were forbidden to use their development server, we kept wasting time exporting their model in a copy (a Jump Start) were we could do the development. The process was more time expensive than doing everything else. I think we spent 2/3 of the time moving content model back and forth. The problem was also that the customer refused to acknowledge that time as “coding time” so the process made us to actually lose money.
Here I realized in no way you have to do this. A reference enviroment where people changes things and then copy back is basically conceptually wrong. You need a development enviroment in local machines for every developer, then use some build script for deployment.
But never apply change in a shared enviroment. Sooner or later that enviroment will became unaccessible leaving you in the dust.
You really need a build
It is actually a bit more that just moving the content model. The entire system is comprised of many different pieces: extension code, imported elements, xml configuration files and so on. Putting all of this manually is really like having to compose a puzzle every day.
We also had a lot of deployment problems because the many different pieces. Assembling the whole reading a document is awkward and really dangerous. You need a build script and a setup script. You need some code that will take care of automatically deploying all the pieces. Without it, you will end up forgetting pieces and then spending hours to figure out what is missing.
AgileSites = Putting all the pieces together
After this nightmare, I was determined to create something we can use for ourselves to save our life from all the problems that plain Fatwire (and Sites) poses. So I created something that:
1. really separates HTML from Java 2. allows to use full Java, without any limitation 3. it has a simple api for starters and common tasks 4. it has an installer for automated build 5. it has support for automated tests
AgileSites was born! How it was applied to real world project is another story, I will tell in another post.
Are you working with Fatwire/Sites REST API, commonly named WEM api? We are currently working with it a lot, building AgileSitesNG.
The API is pretty complicated so we need a lot of processing to locate the informations we use. Furthermore, a common annoyance is getting an authentication token for each request. You can generate a token manually, with a couple of http call, but in the end working with it became awkward and time consuming.
So I started to dream a command line interface like “wem” where I could just select the call I wanto to get the whole json output well formatted. For example, I wish I could do this: ./wem sites
Even better, when I have such a complicated output, Iwould be able to filter part of the content. For example in an ideal world so I could get the list of the users with its roles just typing:
Actually the samples below are not a dream, they are the actual what you have seen before is the real output of the following script (for Linux and OS X).
You can put the script in your local directory or copy the script in a /usr/local/bin/wem file, then execute a chmod +x. Then, most important ensure you have in the paths the commands curl and jq.
While curl is common and available everywhere, jq is less common but you can download it from here http://stedolan.github.io/jq/download/. If you are in OSX and you have homebrew installed you can just type “brew install jq”.
Actually the scripts works fine also on Windows provided you have installed a bash shell, that is provided in counless packages (cygwin, cmder, msysgit etc etc), curl and jq
Note the script must be edited to point to your current installation of Sites. If you have a Jump Start running on localhost with default users and passwords, then you are fine. If it is not the case, the script must be adapted (changing the HOST, USER, PASS variables of course).
Wem Script syntax
The script takes 2 parameters. The first parameter is the Sites API you want to call, as listed here: (without the “/“ prefix). Some examples:
A new “proto” site, pretty full featured for responsive and mobile development.
An development tool chain with on-the-fly compilation of javascript and java sources, including hot deploy of jar and live reload of javascripts
A revamped architecture for AgileSites leveraging AngularJS features
What is in the Proto site
Now, instead of a simple demo we are introducing a complete mobile responsive site based on BootStrap and AngularJS.
Here is a snapshot of what you can see with the Proto site:
The site is actually entirely content managed with Sites:
The development chain
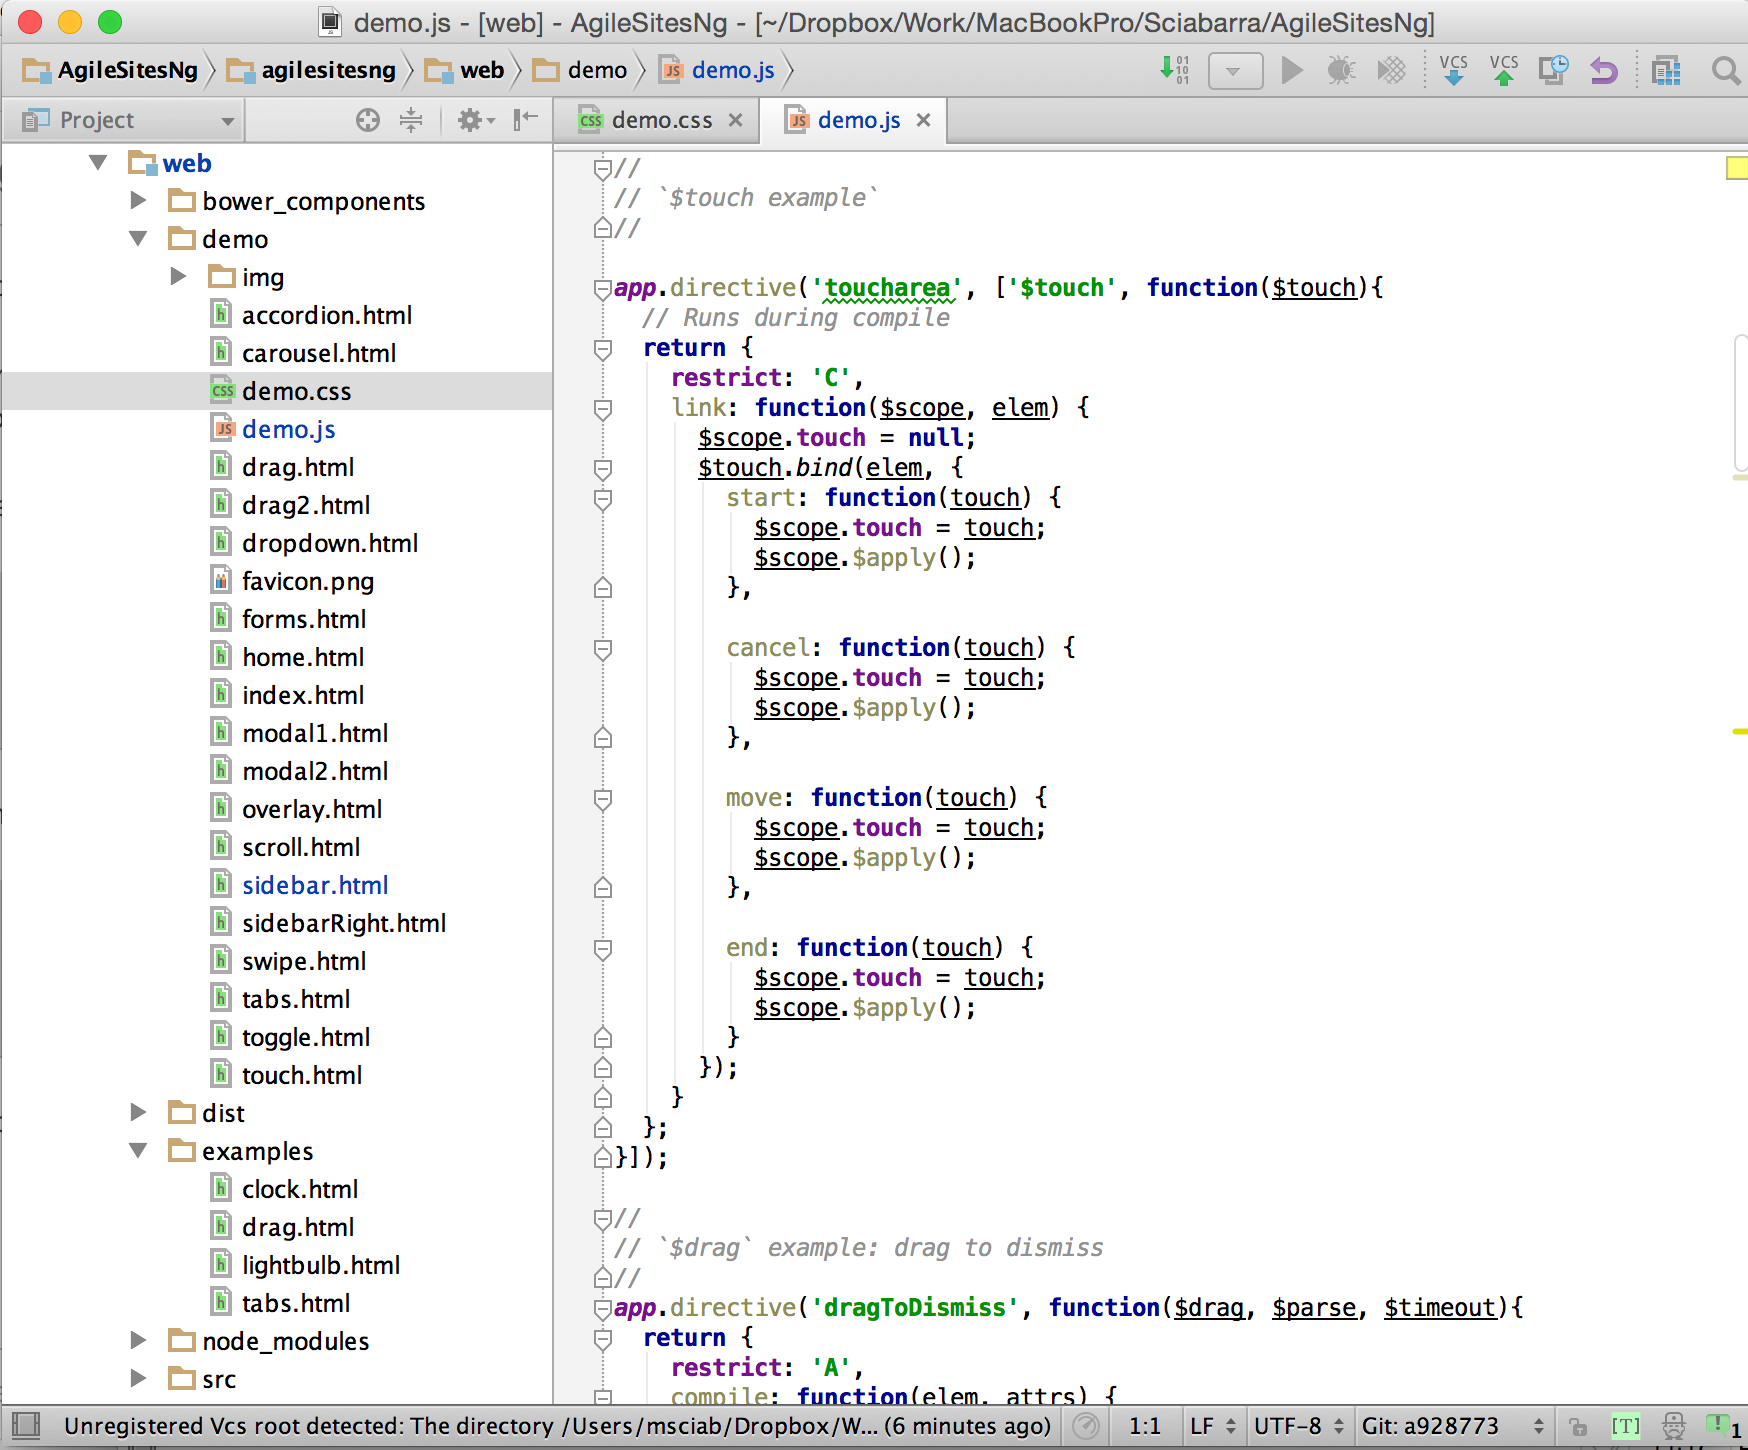
Developers can work using their favorite IDE (for example IntelliJ IDEA in the snapshot) and they can code using directly Javascript, HTML and CSS.
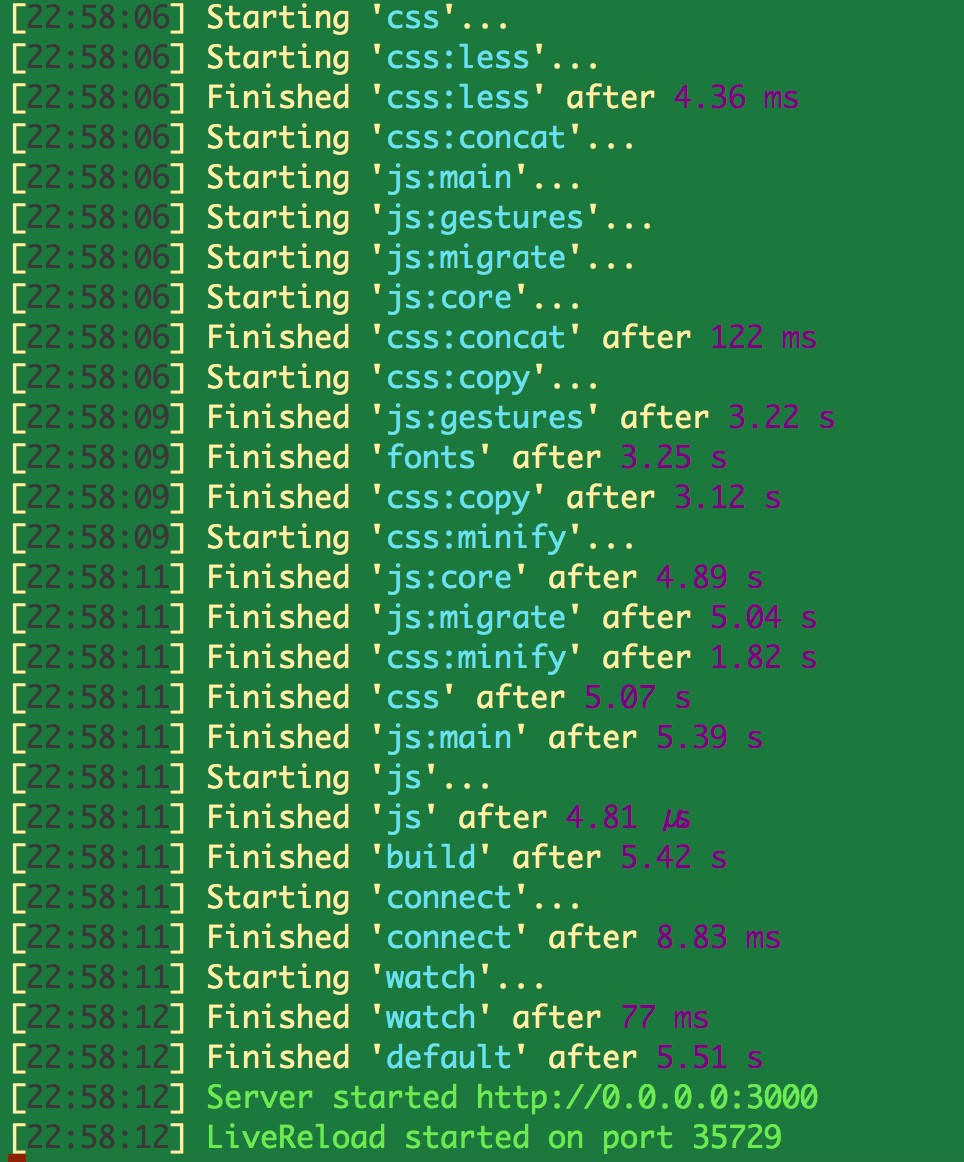
Actually the system integrates preprocessing of less, coffescript and other javascript related technologies, concatenation, minification and compression:
The build system is totally integrated and interactive: editing a “less" or “coffescript" file will trigger compilation to javascript, then the optimization of the web assets, producing the best output even while the development. A nice addition is Live Reload for Javascript. Also the usual AgileSites Hot Deploy still works.
Basically developers can now see instaneously the result of changes to javascript, less files, html and java code without even having to hit the reload button in the browser.
But actually there is more, since even the content model is now automatically generated.
The AgileSitesNG Architecture for Angular
Traditional architecture for javascript works using a page-based approach, with an MVC server based. Angular however is a client-based MVC so the traditional approach does not work anymore. Instead the server need to provide 3 things:
Page Snippets, invoked by Angular when needed
JSon services that fits the Page Snippets
A Navigation that can be configured by the CMS
So, the way AgileSitesNG works is the following:
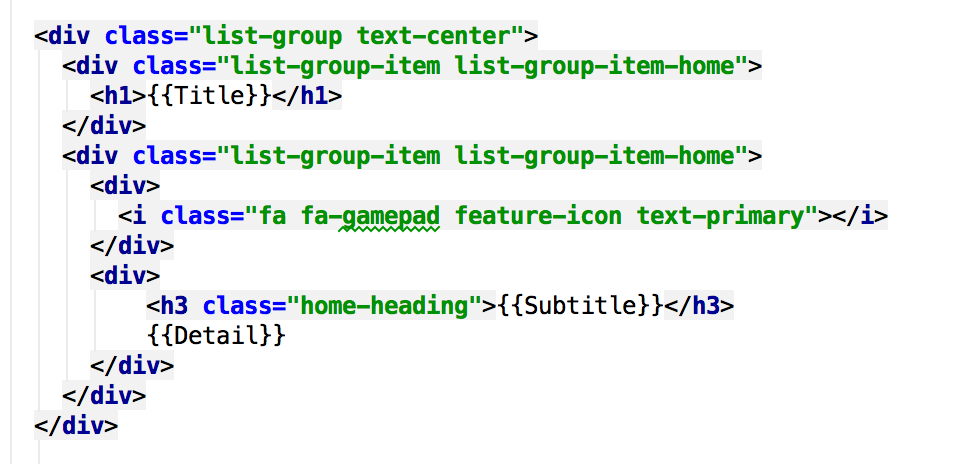
Developer write their code using html code snippets, like those:
The snippets are automatically imported but what is most important is that after the import:
Content Model required to render the website is automatically generated from the template
JSON services to render those templates are also automatically generated from the Content Model
Navigation for the client side application (the routing rules) are generated by Sites site plan.
In the end, developers only need to think to code their client side. The backed support for content managing a site built Angular is generated by the AgileSitesNG framework.
You may want to deploy your WebCenter Sites in a cloud (even a private one). This is a common requirement nowadays. We have done it a number of times, and I am sharing here my experience building this thing.
What you need is an automated installation, and you can do it using the Silent Installer part of Sites. In this post I describe the procedure using Apache Tomcat.
I assume you have an Oracle database already deployed so I won’t cover the details of installing Oracle.
Downloading the needed software
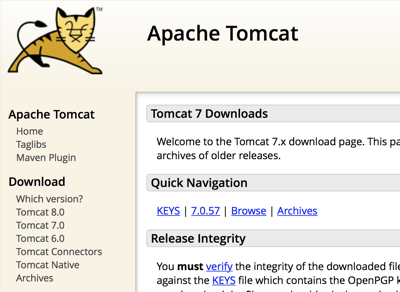
Step 1. Download and unpack Apache Tomcat. First and before all you need to go in the Apache web site and download Tomcat
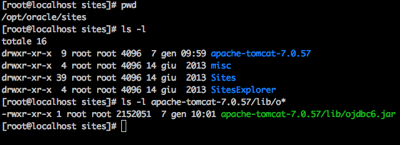
Once you downloaded it, unzip it in /opt/oracle/sites
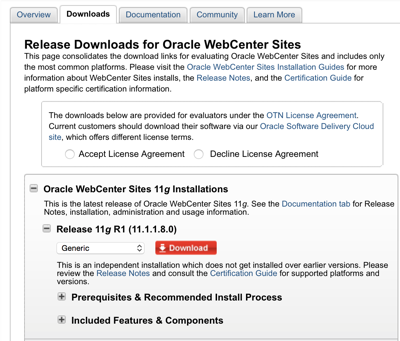
Step 2. Dowload and unpack WebCenter Sites
Now you need to go in the Oracle Web Site (or in the Oracle edeliver site) and download the WebCenter Sites. You have to unzip twice: fist unzip the downloaded file, then locate the WCS_Sites.zip and unzip it again under the /opt/oracle/sites folder.
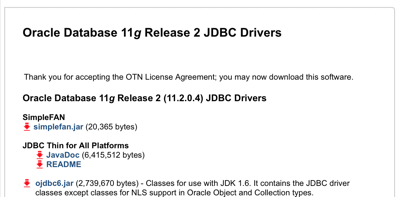
Step 3. Install the ojdbc6.jar and the tools.jar.
Now you need the Oracle JDBC driver. Either get it from the Oracle distribution or download from the Oracle WebCenter Site.
Once you downloaded it you need to place it under the apache-tomcat-xxx/lib folder in order to use it with Tomcat.
Important: you also need to put in the class path the javac compiler. So copy $JAVA_HOME/lib/tools.jar in apache-tomcat-xxx/lib
Let’s review if everything is fine. If you followed my directions you should have now this situation:
Check also that in the apache-tomcat-xxx/lib there are the files ojdbc.jar and the tools.jar.
Step 5. Configure Apache Tomcat.
Edit the /opt/apache-tomcat-xxx/bin/catalina.sh file and add at the beginning, after the #!/bin/bash line:
then edit the file /opt/oracle/sites/misc/silentinstaller/generic_omii.ini and make the following changes:
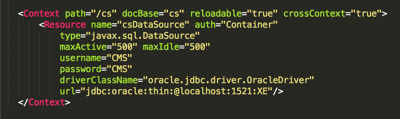
sCgiPath=/cs/ CSInstallDirectory=/opt/oracle/sites/home CSInstallSharedDirectory=/mnt/shared CSInstallAppServerPath=/opt/oracle/sites/apache-tomcat-7.0.57 CSInstallDatabaseType=Oracle10 CSInstallDBDSN=csDataSource CASHostName=localhost CASPortNumber=8181 CASHostNameLocal=localhost CASPortNumberLocal=8181 CASHostNameActual=localhost CSInstallWebServerAddress=localhost CSInstallWebServerPort=8181 Note 1: here I am using host localhost and port 8181 for test - you have to change to the actual hostname and port where the server will be available Note 2: The default configuration will install all the examples. If you do not want then, change all the properties with “Sample” in the name to false. Step 7: Create the database
Access to the database server, and create the user in the database. For oracle, access to the SQLPLUS command prompts as a dba and execute those statements:
SQL> create user CMS identified by CMS; SQL> grant connect, resource to CMS;
Note: this is a very simplified example. In real world you will of course use a better password, and also you will allocate a table space for the user. But here I am only providing a sample.
Configuring Tomcat
Step 8: Configure the database access in tomcat
For tomcat, you have to edit the apache-tomcat-xxx/conf/server.xml and locate the section:
Then add the following code to configure a data source.
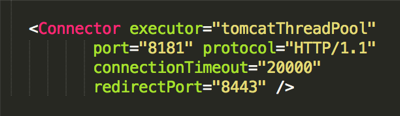
Since I am also installing in port 8181, you need to change the port tomcat listens. This is also in the server.xml: locate and change the Connect section accordingly this sample:
Note: this sample is referring to a local oracle-xe database. In real world you will put your own database parameters. Also, since the oracle-xe binds to port 8080, I had to change it. You may not need this change if you are using a database in another host.
Step 9: Extend the classpath in tomcat
Since CAS expects to find some files in the class path you need to extend the class path. So go in apache-tomcat-xxx/conf/catalina.properties and edit common-loader adding /opt/oracle/sites/home/bin to the class path, as in the following screenshot:
Test it Attended
Now it is time to test if things will work executing an attended installation.
Before begin, copy this piece of code (a tester for data source connection) in /opt/oracle/sites/apache-tomcat-xxx/webpass/cs/testdb.jsp:
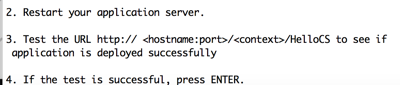
Then the automated installation will start. After a short while it will stop asking to start the application server:
When you see this message, you are not yet done. Now you need to open another terminal, go in /opt/oracle/sites/apache-tomcat-xxx/bin and type:
./catalina.sh run
This command will start tomcat in foreground (a good choice to test for errors in logs).
Now, first test the deployment has been performed properly calling with the browser:
http://localhost:8181/cs/HelloCS
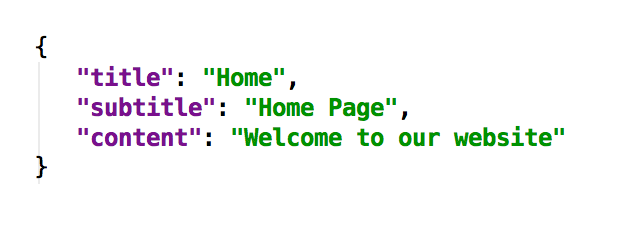
You shold see the following message (o similar depending on the version you are installing):
Also, test database connectivity using the script I provided before. Invoking
http://localhost:8181/cs/testdb.jsp
You should see simpy an OK message (no exceptions or other errors).
If things are ok, come back to the first terminal and press enter. Now the installer will create the database. You will see a number of commands executed. It can take a while
If everything is fine you should be greeted with a message:
Installation Finished Successfully
Congratulations!
Final Touch: automated installation
Ok so far so good, but the automated installer is not good enough for a completely automated installation in the cloud, because it is attended. So we have to automate more in order to have everthing unattended.
The Sites installer stops when it completes the deployment of the war, asking the user to manually start the application server, wait for the application server to be up and running and then complete the installation when the user press a key.
So we need to write a script to perform the synchronization of the installer with the application server startup. I wrote such a script.
Here is the script auto.sh, split in pieces and commented. It is expected to be placed in /opt/oracle/sites. It requires the commands nc and wget to run. Those commands are not standard unix but very common and easily available.
#!/bin/bash cd $(dirname $0) BASE=$(pwd) killall -9 java nc wget
It it a bash script, and it initializes changing to the directory where itself is placed; it kills any process that can be leftover of a precedent run.
echo "<<< deploying sites" cd $BASE/Sites rm out.log touch out.log nc -l 12345 | sh csInstall.sh -silent | tee out.log & while ! tail -n 1 out.log | grep "press ENTER." do sleep 1 ; echo ...deploying... done echo ">>> deploying sites"
After creating an empty log file, the Sites installer is launched in backgroud; the input is bound to a socket listening in port 12345 using the command nc while the output is sent to a log file.
The output in the log file is monitored in order to know when the installer complete its first run and stops, waiting for the application server to be started.
echo "<<< starting tomcat" cd $BASE/apache-tomcat-*/bin sh ./startup.sh while ! wget -q -O- http://localhost:8181/cs/HelloCS | grep reason=Success do echo "...starting..." ; sleep 1 done echo ">>> started tomcat"
When we reach here, the installer has already deployed the war and it stopped with the “press ENTER” message.
Now, we can start the application server (tomcat) and then we wait until the application server is up and running.
We check that the application server is ready, looking for the “HelloCS” servlet and then checking for the “Success” string it contains.
Now we can complete the work. Using the nc as a client we contact the nc listening as a server, and we can notify the installer it can complete its work “pressing enter” in a socket.
So the installation can be completed. We keep looking at the output of the installer until the message “Installation Finished Successfully” appears.
And that’s it.
If you need more...
This script works of only with Tomcat and it only deploys one instance. A real world installation will more likely require the deployment of multiple nodes, satellites and web server and the installation of custom components.
Sciabarra.com is experienced in automating larger and complex deployments, using puppet and ansible to pilot them, and build virtual machines for development with Vagrant. If you need help in this area do not hesitate to contact us.
In this post I am interviewing Rogier Voet, a CMS facilitator that was the product owner in an Agile Projet with a team using AgileSites.
Hello Rogier, can you plese introduce yourself?
Hello I'm Rogier I'm 36 years old and worked primarily for websites whole my career with different kinds of roles, editor, community manager, project manager, content manager and the last years focusing on improvement and innovation of the KPN.com website
What is your specialty area?
I'm a bridge between the business, who wants to achieve certain goals with the website (by adding functionality) and the development team. My specialty is making sure that the solution is user-friendly for both people who have to use/maintain it, but also for the end-user who uses the functionality on the website.
What is your experience with CMS tools?
In my career I have seen a range of CMS tools, from custom developed (PHP) CMS-systems, to different kinds of CMS-software. Simple ones like WordPress, but also Tridion, (several versions of GX Webmanager), Drupal, Fatwire and the lasted version Webcenter Sites
When you happened to work with AgileSites and what was your role?
I worked with KPN Sites, during Project LEGO, which was a Pilot to demonstrate that you can develop, sustain and innovate a website very fast using Agile, Fatwire and this framework. My role was Project Owner/CMS Expert, so I decided which functionality's were to be build and worked with the team so the output was both flexible and user friendly.
Which problems the framework helped to solve?
It was really an accelerator, normally you would much need more frontend development capacity (we only had one frontend developer available), and because of combined code it makes building upon your developed code much harder. Because you separate the work, it's easier to review and test, which is critical part of Agile Working.
Did you noticed any differences using it compared not using?
The rate of development is much higher, also it makes it easier for both java and frontend to work together on a project.
Do you think Agile is a buzzword or can be really implemented?
I think it's both, but I really think Agile can be implemented. It's nothing new, but finally big company's are trying to get it. I worked with small teams for years using this type of methodology. The key part is independence and communication (feedback).
What you would suggest to implement moving forward?
I think this framework is already a smart choice if someone wants to improve speed of development, and increase automated testing. I think it can be improved if the systems also helps more with the importing, exporting and merging code into Fatwire.
What you love to do when you do not have to work with CMS and Fatwire?
I love to spent time with my girlfriend, friends and family; I love playing board, card and computer games. I like to play golf, badminton and cycling. And I always enjoy reading good books and watching movies and serie
In this post I am interviewing David Henriksen who used AgileSites for the implementation of a Telco website and also developed an extension of the AgileSItes framework.
Q. Hello David, please to meet you. Would you like to introduce yourself?
I m a developer, and have 15 years of experience which includes Professional and open source
development in different kind of languages, such as C/C++, Java, Php, ASP.
Q. How much experience you have with Java development in general and with Fatwire in particular?
A. I have 8 years experience in Java, and 2 years with fatwire. That includes both backend enterprise
applications, and more frontend oriented work with Java and fatwire as a platform.
Q. So what you think of the normal Fatwire/Sites development cycle?
A. I think the normal cycle requires a lot of manual work. You have to manually create your attributes, definitions, etc. When it comes to templates, it is also very manual and therefore also very hard to debug, since it's pretty much trial on error, if things doesn't work. You really have to have a good insight knowledge to fatwire, for maximum use.
Q. Why did you decide to change it and try something different?
I was introduced to this framework on a workshop, and must admit I already saw the advantages within the first couple of hours, since I come from a Java world, and is a developer.
We have had a lot of overhead time with doing things more manually, since it requires a lot of know how, when it comes to debugging, but it can also be a trivial task, just to do more complex modeling - and when it comes to version controlling your model and templates, with several development branches, it becomes near impossible.
Q. What changed using AgileSites?
A. With AgileSites everything has become more rapid. It is super flexible, everything is source controlled, and supports therefor branching when it comes to modeling, and templating. Since the whole model is done in Java code, it is easy to restore broken elements, or even do debug stepping when a template is failing - if your unit test doesn't catch the error; this too is very useful. To sum it up, AgileSites has made development more rapid, more transparent and more flexible. It basically gives the developer the possibility to make best use of the time for developing, instead of interface clicking.
Before AgileSites, it was very hard to be an agile development team. Now with the flexibility that AgileSites offers, agility has become an opportunity and natural choice, when developing for Oracle Webcenter Sites.
Q. What is your work currently?
A. Currently I work in a smaller team, which is developing a new responsive website for a Danish telco brand, using AgileSites together with webcenter sites. Furthermore I'm using the ZKoss
framework for developing the self service part.
Q. You worked on an extension for AgileSites. Can you tell me more about this extension you did?
A. I wanted an easy way to model asset definitions in AgileSites, which could help with supporting
rapid development, but also give a certain amount of transparency of the data model which is a
given, when you design bigger sites with complex models. To solve this, I developed an annotation driven modeling method - inspired from JPA and
Hibernate. All you have to do, is to make a simple POJO class, which defines the asset definition and
attributes. It of course supports various properties, such as parent links, multiples, editors, asset
types and so on.
Q. What are your plans moving forward?
A. The next natural step, would be extending the model so it can be used as a data container, in the
templates. By doing so, it will add safety to the template attribute references.
Let's face it. The vast majority of Sites project are late already the day when development starts.
As a result, delivery pressure is high, budget is usually under heavy scrutiny and all the “unnecessary” development tasks are cut out, since d no one is allowed to “waste time”.
Under this so common scenario, let see what usually happens
The low-quality, late project: one years instead of 5 months
In the standard scenario (I would say, 80% of the real world projects I worked on) pressured developers rush write as much code as they can quickly, while project managers usually plan skipping altogether the task of writing automated test.
The common motivations are usually:
“because there is no time”
“it is redundant since there is the QA team for that”
“We need to double the amount of code to be writter”
Often there is another motivation, but no one admit it: we do not know how to do it!
Developers are expected to code their part and test it… manually. No test code is asked to be delivered.
The big problem you face skipping test automation is the QA team needs to do a lot work. Lot more than necessary actually. The most important waste of time is the need to test and retest everything at every release cycle.
Why? Because in a manual-test-only environment, once a bug is fixed, it not fixed forever! Experience shows bugs thought to be fixed can pop up again at any moment. Also, new bugs will be introduced in old code, so testers do not trust that old bugs are gone! Since there is no way to know the quality of the whole project, testers end up repeating the whole testing cycle many many time.
If you look to real world numbers you can easily see that in a non-automated test environment, the QA cycle can takes up to 3 times the development time. So in a project initially scheduled to be 3 months of work, with 2 months of testing, you usually end up testing and fixing bugs for six to nine months, delivering the project after one full year!
The unfortunate occurrence is the consequence of cut out any “unnecessary”. Or simply not following a true agile practice (although the rush-to-code development method is often sold as an agile one!).
The high-quality, on-time project: 6 months of build-on-quality project
Test automation however, one of the key features offered by AgileSites, is something that can completely change the landscape of your project, keeping it on track even under heavy pressure constraints.
Assume that, even if you have strong time constraints, you can manage to convince the customer to add to the 3 months of planned development time, and to 2 months of testing planned, one extra month allowing developers to actually write automated tests for their code.
I am well aware that that this is a very difficult task for many project managers! I also understand that normally writing tests in sites is not easy. Actually, allowing code testability is the main reason of the existence of AgileSites ! Someone suggested that AgileSites should be instead named TestDrivenSites.
It is also true that writing tests can be seen as an additional burden to put on the shoulders of the developers. So instead of taking 3 months of developments, with appropriate tools it will take maybe 4 months. This can be seen as a waste. It is not: developers are the best people to write automated tests for their code.
Why developers should write tests
You may ask: why should developer write tests? There are the testers for that! That is, unfortunately, an inaccurate view of the development process. First, developers usually DO test their code. They need to. No developer can write a piece of code and produce instantaneous correct code.
Every developer, after writing the code, they verify if it works. At least if it works at least a little bit… The problem with code manually tested is that the test follows an an ad-hoc, unrepeatable and manual process, and is performed in a limited development environment.
As a result, developers ends up testing their code in an unrealistic environment, without integrating their work with the work of others, often limiting to test just a few use cases, and then they throw away forever this significant amount of work! Not writing automated tests usually means to throw away at least half of the development time.
Also a developer is the only person in the world to know really need to be tested, since they wrote they code. They know what they should check. They can look at their code like in a fishbowl and check the fish is doing what is expected. On the opposite, testers are looking in a black box, they have no clue what the code is doing so much of their tests are an educate guess and they may test what is actually constant, so it cannot change! So they waste a lot of time testing unnecessary parts.
Surprise! The extra investment pays off. Hugely.
If you really allows developers do that, benefits are huge.
First, code delivered to the QA teams is in a much better shape. Basically it is already largely tested and mostly works. So the QA team must check for real bugs, not for integration issues, overwritten code, forgotten features.
Second, because there is a test suite, you do not have to run an entire test cycle for every releases. In such an environment, the QA cycle is very fast. The QA team can test the work, then produce bug reports that are sent to developers. Developers will fix the bugs, but because there is a test suite, they can be sure they are not going to introduce new bugs.
Third, the QA team can be confident of the safety of the fixes, and usually they will run the full test life cycle only twice: the first time, and the last, before the release. Using automated tests, there is confidence that only new things must be tested, and not everything.
So just adding one month of extra work (actually, an additional test-while-you-develop, or build-in-quality step) your project can be actually delivered in 6 months!
Those are not hypothetical numbers, are real numbers, proved in countless projects actually following agile practices. Actually, this is Agile development.
Why it is so uncommon to actually automate tests?
Definitely in the Sites world, the biggest obstacle is the lack of tools allowing you to write real tests for your code. In Sites, JSP does not allow for an easy way to automate tests. You have to resort to tools implementing browser automation like selenium.
The problem with browser automation is you end up testing the full rendered html page, the whole thing, the final deliverable. Experience shows if have to test the whole thing without splitting in parts, it is very inconvenient since the combination of the possibilities is huge.
It is much better if you can test the building blocks in isolation. That is what AgileSites test support allows for. Next week I will write a post explaining how AgileSites actually helps you to separate html from java and write unit tests for every parts, but in the meanwhile you can check the relevant page in the tutorial: http://www.agilesites.org/tutorial/Testing.html