06Feb2011
FatPhone installer requires creation of elements, as well as assets. But XMLPost does not create those elements, at least for Templates, so the installer has to create those elements calling directly CatalogManager .
I wrote a Javascript class that does just this: interfaces with CatalogManager for creating and querying rows. Since this class is useful by itself, I am writing this post as documentation for general usage.
Code is available in the FatPhone github public repository: the file is named catalogmanager.js. It is released under the GPL. You can download and use in your project freely. There is also a test html page to test and call it interactively.
Now, 2 important warnings:
- You cannot use it locally. You have to copy the code in the static area of your FatWire installation site, and invoke the javascript with a browser. Security restrictions prevent executing remote http calls from locally loaded files.
- It is not 100% complete: does not offer access to every feature of CatalogManager. Nonetheless, in the current state, it is useful to create, update and delete rows, perform simple queries and check if a row exists.
It can also already perform generic queries, but the returned result is just the HTML of the response. I should parse the HTML and return the answer in json format to be more useful.
To summarize the available functions:
- Create a new Catalog Manager object.
- Login into content server.
- Select a row (returning the result in)
- Check for the existence of a row
- Add a row
- Edit a row
- Delete a row
Creating a new Catalog Manager object
var cm = new CatalogManager(url)
where url is the Fatwire ContentServer base url (tipically http://www.yoursite.com/cs/),
Login into FatWire
cm.login(username, password, loginFunction, errorFunction)
where username and password are your FatWire credentials. If login is ok, loginFunction is called, otherwise errorFunction is called.
Select a Row
Once you are logged on , you can execute calls. The simplest call is:
cm.selectRow(tablename, where, what, callbackFunction)
this will perform a query on the given tablename, specifying a where condition and what (fields) to search for. The callbackFunction will be called with the result.
For example,
cm.selectRow(Page, "id", "name='Home'", alert)
will show in an alert box the result of searching the Page table for records with name Home, and will return his id. A simple regular expression can extract the id from the returned result. I do exactly this in the installer, you can check the source code of install.js to see an example.
In an ideal world, I should parse the returned html in a structured javascript object (an array of maps, for example). If you want to improve the code before I will do it... your help is appreciated.
Check for existence of a row
cm.checkExist(tablename, selwhere, found, notFound)
This function perform a limited parsing of the result to see if the row in tablename, specified in the selwhere, was found or not. The appropriate callback function is called according to the result.
Add a row
cm.addRow(tablename, data, nextStep)
tablename is a string, the name of a row, while data must be a map. For example, this call create a new Element in the ElementCatalog (assuming that elementName, fileBody, fileName and fileFolder are defined, of course):
cm.addRow("ElementCatalog", {
 "elementname" : elementName,
 "url" : fileBody,
 "url_file" : fileName,
 "url_folder" : fileFolder
 }, nextStep)
The function nextStep is called with a status object passed as the first parameter. The status is a map that has at least 3 keys:
- ok is a boolean telling if the result is successful or no not
- answer is the unparsed answer
- parsed is a boolean telling if the answer was parsed. If true there are also the following fields defined (parsed from the CatalogManager returned status)
- result
- reason
- err
- command
Edit a row
cm.editRow(tablename, data, nextStep)
tablename is a string, the name of a row, while data must be a map and nextStep is a function called with the status of the result.
Both data and the return status have the same format as in addRow, except that the data must specify the id field to make the call work.
Delete a row
cm.deleteRow(tablename, data, nextStep)
tablename is a string, the name of a row, while data must be a map and nextStep is a function called with the status of the result.
Both data and the return status have the same format as in addRow, except that the data must specify an id field to make the call work successfully. Actually, in the delete the id is the only required field, any other field in this call is just ignored
30Jan2011
Finally FatPhone v0.1, a real release (not just an experiment), is ready. Please, let me call it alpha release, although it is in the "works for me" status... You can grab the code on github.com/sciabarra/fatphone.
It took me almost 2 weeks of spare time coding (and not only spare time, since this effort consumed a good amount of actually billable time...) but the first real release of FatPhone is here!
It is amazing how much work it takes building something good for public release starting from something that is perfectly fine for internal use.
The installer
The biggest challenge has been actually to code an easy to use installer. I have the FatPhone code since a while, but how can I give it away in a form that can be installed, easily, in Content Server? The common way of releasing code is using Catalog Mover dumps, but this solution is far from satisfactory.
I was worried that releasing Catalog Mover is going to export proprietary FatWire informations. So I dropped the idea.
After some attempts, I settled for coding a standalone installer. After considering Java, i decided to code it in Javascript instead, using jQuery. Javascript has become amazingly powerful and flexible, these days.
The installer creates elements in FatWire using the external CatalogMover interface; it creates assets using the XmlPost interface. Because I am only using documented interoperability interfaces (I didn't reverse engineer anything to do so), I should be safe on the legal side (otherwise, tons of end user browsing Fatwire website are violating some license...).
It was an intense hacking experience (more complex that the whole FatPhone website itself) but at the end I built it and I am pretty happy of the work done.
Installing FatPhone
Using the installer, setup of FatPhone is very easy, and works with different version of ContentServer. I started using JSK 7.0.2 then I deployed in JSK 7.5.2
Before you start, create a new site (following these directions), and call it FatPhone. Then you have to grab the source code from github and copy the fp directory in the root of the web server sitting in front of your FatWire installation.
Note: don't load the installer in the browser from localhost: it does not work. You have to deliver the fp folder in the same web server as the ContentServer: the JavaScript will then connect to the CatalogManager running in the same server.
The fp folder must be accessible as /fp , so you can call the installer as http://yoursite/fp/install.html. The /fp directory is hardcoded, for now. This may change in the future.
When you call the installer, you will see the following screen:

You have to type credentials of an user that can create Elements and Assets in the site FatPhone. Click on Login, and if everything is ok you will see the message:
Username/password validated.
Now you can install the Elements. You will see this screen:

Click on "All" to select all the element then click on "Install Elements". If everything is ok (and it should) this is the result.

You can then do the same for the assets and this is the final expected result:

Note that the installer is incremental and supports installation and updating of single Elements and Assets. I am basically using it as a replacement for Content Server Explorer! I will blog more on this installer in the near future, but for now, let's come back to FatPhone.
The FatPhone site
After the installation, there are some new templates, and a number of pages. Pages are created more as a sample, the real code is in the templates. But the Pages are already available to experiment with. If you search for Pages, this is the list of the created Pages:

After the creation, Pages are all unplaced. You can (and should) arrange them in a hierarchy in the SitePlan as you like.
Note that is the SitePlan that configure the site navigation, so you have to create the site plan.
Here is an example.
 The result is now a real iPhone web site that can be navigated. Pages are rendered as full web pages, using the page name as the title, and the page description to list them in a list. Children of a page in the site plan are shown as children of a page in the iPhone site. I used the filename field to specify to the icon for each page in a link. See a couple of screenshot below:

 Actually, you should try into an iPhone simulator, because Page transitions have the typical scroll effect of iPhone application. This feature comes directly from the underlying iWebKit toolkit.
What is next?
So far I have implemented:
- the installer,
- the layout using iWebKit,
- the SitePlan hierarchy
- navigation between pages.
The project is far from complete, and I have still a lot of already written code I have to migrate to the new architecture.
I spent actually 90% of my time (and 99% of my energy) building the installer, that is an achievement I am proud of.
The installer is very useful also standalone, not just for FatPhone but also for your development project. It allows to build and update a Fatwire Site from code and data stored on the filesyste, using only eclipse (without any plugin!) and a browser. It can upload both Elements and Assets (only basic asset, for now), and I suspect it may be even more useful to the Fatwire Community than the FatPhone site itself. I am releasing it as open source as well as part of FatPhone, for now, but I wait for reactions from the community to see if it is worth to be packaged and improved.
Comments welcome.
21Jan2011
I am a bit silent in the blog these days because I am very busy building an easy installer for FatPhone.
In the process I am learning a lot of new stuff. Well, not exactly new stuff, it is actually old stuff in a new dress. Anyway I am excited to discover how using jQuery it is possible to implement in simple JavaScript what previously has to be done in complex Java.
Basically the biggest challenge of the FatPhone installer is to implement the creation of new asset, not just loading Elements. I want to use Javascript instead of CatalogMover, and I am having some success in this process.
A jquery asset creator
In this post I am talking about one of the "secrets" of the upcoming FatPhone installer. I mean, asset creation using jQuery.
It is not all jQuery. Fatwire side, I am using the entry point for the XMLPost. You usually use XMLPost with the XMLPost utility.
Since it is not so easy to use it, I decided to keep the XMLPost on Fatwire side but write in jQuery the client side. Let's see how.
Describe in JSON (instead of XML)
Let's assume we want to create a new asset, for example a Page, with name "Home" and description "HomePage".
You can describe this stuff in json, so this is the body of the Home.json file:
{
 "AssetType": "Page",
 "publication": "FatPhone",
 "name": "Home",
 "description": "HomePage"
}
"AssetType" is there because we are going to use the XMLPost entry point to create the Asset, and it requires a field "AssetType" to decide which type of asset is going to create.
Also "publication" is required to define to which site the new asset will belong.
The other fields are just fields of the asset.
Write the jquery post script
The HTML containing the jquery script is:
1. In the header load jquery
<script type="text/javascript"
 src="http://ajax.googleapis.com/ajax/libs/jquery/1.4.2/jquery.min.js">
 </script>
2. Define the url to access the XMLPost entry point:
<script type="text/javascript">
 var csUrl = "/cs/ContentServer"
 + "?pagename=OpenMarket/Xcelerate/Actions/RemoteContentPost"
 + "&authusername=fwadmin&authpassword=xceladmin"
</script>
Note that here I am assuming that the script will be called from the same host where is ContentServer. Also as username and password are the standard ones. Of course this should be true only if you are in a local installation... So remember to change username and password.
3. Now let's write a new function:
<script type="text/javascript">
 function createAsset(fromFile, toUrl) {
   $.getJSON(fromFile, function(data) {
     $.post(toUrl, data, function(result) {
       alert(result)
      })
    })
 }
 </script>
What this script does:
a) it reads the Home.js (containing json data) and stores the data in a local javascript variable.
b) it performs a post with the read data, using as target the XMLPost entry point (the url we have already defined before).
c) finally it displays the result with an alert window.
4. It is now time to create a button that will trigger the execution of the function; we put the button in the HTML body:
<body>
  <input type="button" value="Create Home Page"
    onClick="createAsset('Home.js',csUrl)"/>
</body>
That's all. Let's test it.
An example
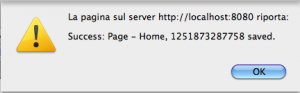
If everything is fine, clicking on "Create Home Page" button you will receive a messagge announcing that the asset has been created sucessfully:

If you inspect the backend you should be able to see the page in the site plan as well:

If things don't work I recommend checking carefully urls, username and password, and inspect execution with FireBug.
19Jan2011
I received a number of emails about installing FatPhone, and it turned out that the Fatwire Eclipse Plugin allows to commit only content that has been checked out from the same content server. So basically the suggested way (use the Eclipse Plugin to deploy the code) does not really work as expected...
I found a rather tricky way to overcome this limitation, but also someone complained that having to install eclipse just to deploy the code is not... ehm.. "nice".
So I decided instead to find another way to publish the code.
After some experimentation, I am currently convinced that the best way to release FatPhone is writing some scripts that publish content assets using XMLPost. I am currently working on it.
I have some working code already, but since I have also some "real world" work to do, the process is taking a bit more that I hoped.
However I am still committed to release FatPhone (an improved and simplified version actually) , hopefully in a form that there is minimal work to set it up and running.
As usual, if you are interested, stay tuned.
18Jan2011
Let's start our FatPhone project - an iPhone site in FatWire.
In this tutorial you will learn how to create a new site in FatWire Content Server 7, using the Advanced interface.
Creating a site is easy, but is is not a single step process. So here I am going to explain all the required steps.
New Site
You need to get access to the administrative tab, obviously called Admin . By default, after the installation you can access it using the fwadmin user.
If you can see the Admin tab, selecting it you can also see the node Sites. Now, expanding the node will reveal the "magic" Add new link.

Click on it, and then the Add new site form will be displayed to the right:

Specifify name and description, click Add Site and you have a new site. But you are not done yet...
Enable Assets
Exapanding the node of the new site you will see more options.
The necessary next step is now to enable the assets you need.
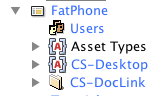
Expand the Asset Types node:

Clicking on Enable you will see a list of all the availabe assets in the system.
The absolute minimum are Pages and Templates. So select them:


Create Menu Items
After enabling them, the system will ask you how do you want to find and create Pages and Templates.
The standard way is to have an entry in the menu New and another entry in the menu Find. You can create them later, and in certain case it is appropriate NOT to have the default entries ,but instead create some more specific entries.
But for now let's accept the default:

Done?
You have now a new site, with a few assets enabled and you can work on it. It is enough to start to work on FatPhone.
Anyway you will have to create a new user and enable a role for it, either fwadmin or (better) another specific user (fpadmin).
In the next tutorial I will show how to create such an user. Stay tuned.
16Jan2011
In current code there is just the layout!
We have already written the code for an iPhone website, but releasing it on the public is a different matter.
The code needs to be updated, cleaned up and documented. So we are basically rebuilding the old web site, collecting the code documenting and releasing it, step by step.
The first code drop is now on GitHub, here. IT IS ONLY THE LAYOUT! Not editable yet.
How do I deploy it?
To deploy it you have to follow the provided directions, admittedly not very detailed. It will improve...
You have to:
- manually create the site,
- deploy the css and javascript in your webserver,
- download and install an eclipse plugin (and eclipse, if you don't have it, too!).
After this, you can:
- checkout the code inside Eclipse
- then use Eclipse to publish it.
Definitely, not a task for the faint of hearth.
Ok, but what I will get?
Not too much, yet. Basically, a page like this:
 Don't be fooled! It is just static html. There is only the layout, for now, and I put some sample html in it just to see the rendering.
Cannot be edited with FatWire, yet.
But it will became a standalone editabile web site in the foreseeable future. Stay tuned.
13Jan2011
Have you ever wondered what an ACL in Fatwire really is?
I have seen countless times, when a customer have to create a user, that he gets lost when he sees the following option:

The common reaction is just to select everything and move on...
Not a great choice in term of security.
Also, very often customers do not distinguish well ACLs from Roles.... They often think they are the same thing.
So, if you have this problem, read on...
So, what is an ACL, anyway?
First and before all, an ACL is just a symbolic name describing a set of permissions.
ACL are configured in the SystemACL table.
You can see existing ACLs looking into the SystemACL table itself. If you try to edit, for example, the PageEditor ACL, you will see something like this:

PageEditor ACL
Now, think to this set like a set of actions you can execute against a database table.
You can read a specific row, search in it, create or update a row. Also, as a special permission, you can read the revision tracking (that is basically a log of the modifications) and edit them (removing old revisions).
Ok, they are CRUD permission. What now?
So far an ACL just describes permissions you have on a single database table. But how do you associate a permission to a database table?
The secret is the SystemInfo table: give a look to the following snapshot, taken using ContentServer Explorer:

SystemInfo with ACL
As you can see, each table is protected by an ACL. And the ACL describes what you can do with that table, if the user accessing to the table has that ACL.
So, here how actually ACL works:
First, you are identified:
- If you did not use any password, you are the DefaultUser, and have the ACL of the DefaultUser.
- Otherwise, you was identified using an username and password, and you have now the ACL associated to that username.
Second, this is what happens:
- Whatever you do, at some point you will try to do an action against a database table
- The system checks if you have one of the ACL associated to the table. If not, access is denied
- If yes, the system checks if the ACL allows you to do the action you require. If not, access is denied.
- Otherwise, you will be able to execute the required action as the logged on user.
So basically, ACL protect database tables. They are a very low level feature.
They have nothing to do with Roles, that is a CMS concept (a more elaborated and very different feature).
Hmm, what already defined ACLs mean?
Here a few random notes taken looking at the standard SystemInfo configuration:
- a ElementReader can read the ElementCatalog while an ElementWriter can modify it. Writing the ElementCatalog is usually required only for developers.
- a PageReader can read the SiteCatalog while a PageWriter can modify it. SiteCatalog configures cache , so accessing it is required mostly to a system administrator (or to a developer that configures cache and permissions)
- SiteGod is present everywhere allows can do everything, so it is a very dangerous to give this permission. Normally is there only for maintenance reasons.
- xceleditor is required to access to the CMS tables, so any user in the editorial team requires it.
10Jan2011
FatPhone, our open source FatWire project, is an implementation for FatWire Content Server of the iWebKit open source template.
The code is already written, but will be made public in a series of blog posts. In addition I plan to drop the code into a GitHub content repository. I have still to decide the best way to release the code, any suggestion is welcome.
Once implemented FatPhone in your ContentServer, you will be able to access the site with an iPhone and you will see something like this:

SitePlan
The website is not, of course, just static html: instead it can be fully managed using ContentServer backoffice. Each web page in the site is built using the SitePlan.
For example the siteplan corresponding to the home page is the following:

Basically, each page is rendered using its children as elements of the page.
There are special decorations for each page (implemented as associated elements) to accomodate for titles and separators.
Pages in my design are basically containers for list of elements.
Page Subtypes
Since there are different kind of lists in an iPhone user interface, we have different subtypes for Page. For each subtype we have a different rendering.
For example, the first screenshot shows the rendering of a Page with subtype HomePage. The followingn screenshot is the rendering of a Page with subtype Products:
 And here is another snapshot, showing a Page of subtype Music:

Mobile FlexFamily
Of course, not everything is a list of elements, so we do not have only Page rendered as a list. There is some real content somewhere!
We defined a FlexFamily to store the "real content". Here is a snapshot of such a FlexFamily:

Using that family , we can add for example a text page like this:

What is next?
Snapshots are taken from the current version of FatPhone. I am actually writing a new version, cleaning up all the code, solving a few design problems and cleaning up everything for release.
I am still unsure how to release the code, and since there are not so many Fatwire Open Source projects (except FatClipse, I am aware of none). I am experimenting with a few possibilities.
I hope now you have a good feeling of what FatPhone is.
All the implementation details and the code will be made public in the next few weeks through this blog. Stay tuned.
06Jan2011
Starting today, I will publish a series of articles describing how to implement an iPhone mobile site developed with Fatwire.
The project is called "FatPhone". I do not call it FatIphone because the web site can be accessed also by Android devices and other recent phones with a decent browser.
Why?
I built an iPhone demo site for a customer. The customer was happy of the demo but asked me instead to implement a mobile application, interacting with Fatwire through restful web services.
While I think it was a good decision for the specific needs of the project (some requirements was not easily satisfied by a web site), there are plenty of cases when a mobile web site is still a perfectly valid choice.
So I have decided to clean up the code, release to the public as FatPhone and write some blog posts about it.
The code of the site is going to be open source, released under the GPL v3.
How?
FatPhone will be based on the wonderful open source css/html framework iWebKit.
Basically FatPhone is a port of iWebKit to Fatwire.
The project requires the following steps:
- define a new Flex Family Mobile to store the specific mobile content
- define a SitePlan and Page subtypes to create the "infrastructure" of the mobile site
- code all the templates, specifically:
- the typeless Layout
- the typed template for the different Page subtypes
- the typed templates for the newly defined Family
If you are interested in this project, stay tuned.
03Jan2011
In Fatwire, there are 2 types of custom assets: Basic Assets and Flex Assets.
Some Fatwire sites, developed ages ago, are still based on Basic Assets, but the vast majority of recent Fawire web sites are instead based on Flex Assets.
Why Flex Assets?
Modern sites are based on Flex Assets for a reason. Flex Assets are… well, flexible.
The fundamental feature of a Flex Asset is the ability to add fields at any moment.
You can update your site at any time, adding new fields but keeping all the existing content.
Also Flex Asset are organized in Families, so you can easily build hierarchies and render them in a treetab.
There are also a lot of other features that I cannot simply describe in this post.
But this flexibility comes with a cost.
- The underlying database structure of flex assets is pretty complex.
- Attributes are not stored simply as database fields, so the underling database structure is pretty obscure.
- Asset creation is slower that Basic assets
- Searching attributes has some limitations and can require complex code.
That said, it is not to discourage use of Flex Assets. On the contrary, they are the best choice for almost all the common uses cases.
However, there are a few of them you can still consider the use of Basic Assets
Why Basic Assets
On the contrary, basic assets do not have all this flexibility. Once created, they have a fixed structure.
The normal way to upgrade them is to drop them and recreate with the new format.
You can still save the content but you may require to use some database magic.
But the underlying structure is simpler and straightforward.
Basically
- for each basic asset there is a database table,
- for each attribute there is a field in the table.
This property turns to be useful in many cases. So I do not consider Basic asset to be obsolete, but simply a Fatwire feature useful in certain tasks.
So far, I found basic asset to be useful for example to:
1. store user generated content: This because it is faster and simpler to create a basic asset than a flex asset
2. store legacy content: because the straightforward structure of a flex asset make easy to load the content with simple database queries